

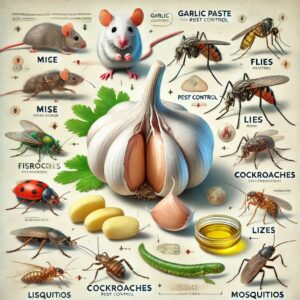
 Guide: How to Use Garlic for Pest Control
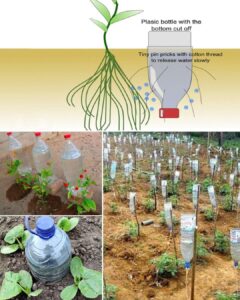 How to Water the Plants for a Month at No Cost
Method 1: Slow-Release Watering Using a Buried Plastic Bottle
Materials Needed:
1. A large plastic bottle (2-liter size works well)
2. Marker
3. Sharp tool (awl or heated iron rod)
4. Water
Step-by-Step Guide:
1. Prepare the Bottle: Clean the bottle and remove labels. Mark two lines on it – one approximately 15 centimeters from the bottom and another 10 centimeters from the neck.
2. Create Water Outlet: Make a small hole about 7 centimeters from the bottle’s bottom.
3. Fill the Bottle: Fill it with water up to the lower line and tighten the cap.
4. Place the Bottle: Dig a hole near the plant and bury the bottle up to the marked line, with the hole facing the plant.
5. Final Step: Fill the bottle completely, close the cap, and cover it with soil, leaving the neck exposed.
Method 2: Wicking System with a Plastic Bottle and Fabric/String
Materials Needed:
1. Plastic bottle
2. Cotton fabric or thick cotton string
3. Water
4. Sharp tool for making a hole
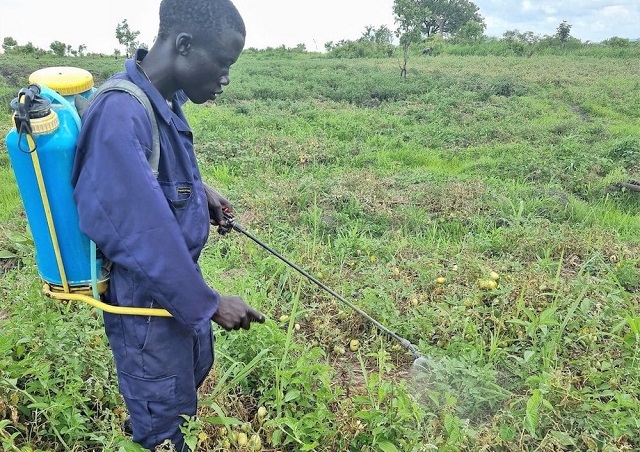
 How can you protect & prevent leaf blight in tomato using vinegar & soda organically?
Late in the afternoon spray Soda solution at a ratio of 4 teaspoons in 16 litres water.The Soda will block growth of fungi on leaves of tomato plants & other organically by raising the leaf PH level.Is effect way to treat powdery mildew, leaf spot ,leaf blight (chiwawu) especially during rains and cold weather.
Early in the morning spray vinegar at a mixing ratio of 4 teaspoons in 16 L sprayer.Vinegar is a natural disinfectant, natural antibacterial, antifungal, which cleans up harmful micro-organisms at the surface of leaves or on other uses.
Note ; excess of vinegar may harm the plant organically, you make sure you spray once or twice a week but shouldn’t exceed that interval.
How to grow a young kiwi tree in a pot…
Extracting the seeds: Cut open a ripe kiwi fruit and scoop out the seeds. Rinse the seeds under cool water and let them dry on a paper towel for a few days.
Germinating the seeds: Kiwi seeds need to be stratified (exposed to cold temperatures) to germinate. You can stratify the seeds by placing them in a damp paper towel or sphagnum moss and putting them in a plastic bag in the refrigerator for 3-4 weeks. Check the seeds regularly and make sure the paper towel or moss remains damp.
Planting the seeds: Once the seeds have stratified, plant them in a small pot filled with a mixture of potting soil and perlite. Bury the seed about 1/4 inch deep in the soil and water it gently. Cover the pot with plastic wrap to create a mini-greenhouse and place it in a warm, bright location. Keep the soil consistently moist, but not waterlogged. Transplanting the seedlings: After a few weeks, the seedlings should start to sprout. Once they have several sets of leaves, they can be transplanted into a larger pot. Use a pot that is at least 18-24 inches in diameter and 24 inches deep, filled with a mixture of potting soil, compost, and perlite. Caring for the kiwi tree: Kiwi trees need plenty of sunlight to grow and produce fruit. Place the pot in a sunny location or use grow lights if necessary. Keep the soil consistently moist but not waterlogged. Fertilize the tree with a balanced fertilizer every 4-6 weeks during the growing season.
 An Introduction to Soilless Farming
What is Hydroponics?
Hydroponics is a method of growing plants without using soil. Instead, plants are grown in a nutrient-rich water solution that provides all the essential minerals directly to the roots. This innovative farming technique allows plants to grow faster, produce higher yields, and use less water compared to traditional soil-based methods.
How Does Hydroponics Work?
In a hydroponic system, the plants’ roots are either submerged in or regularly misted with a water-based solution that contains all the nutrients the plants need. Since the roots don’t have to search for nutrients in the soil, they can absorb them more efficiently, leading to quicker growth and healthier plants.
Types of Hydroponic Systems
1. Nutrient Film Technique (NFT): A thin film of nutrient-rich water continuously flows over the roots, allowing them to absorb nutrients while getting enough oxygen.
2. Deep Water Culture (DWC):Plants are suspended in a solution of nutrient-rich water, with their roots fully submerged, providing constant access to nutrients.
3. Drip System:Nutrients are delivered to the plant roots through a network of tubes, providing precise control over the feeding schedule.
4. Wick System: Nutrients are drawn up to the roots through a wick, making it a simple and passive system.
5. Aeroponics:Roots are suspended in the air and misted with a nutrient solution, providing maximum oxygen exposure and nutrient absorption.
Benefits of Hydroponic Farming
1. Faster Growth: Plants in a hydroponic system can grow up to 50% faster than those in soil because they have direct access to nutrients and optimal conditions.
2. Higher Yields: The controlled environment of hydroponics allows for more frequent harvests and higher crop yields.
3. Water Efficiency: Hydroponic systems use up to 90% less water than traditional farming since the water is recirculated and reused.
4. Space Efficiency: Hydroponics can be set up in smaller spaces, making it ideal for urban farming or indoor gardening.
5. Pest and Disease Control: Without soil, there is a reduced risk of soil-borne diseases and pests, leading to healthier plants and fewer pesticides.
6. Year-Round Growing: Hydroponic systems can be operated indoors, allowing for consistent crop production regardless of the season.
plants in a controlled, soil-free environment.
Liziwe Msane Nobela Farms Nobela Farms @top fans